BBQ Chicken

Ok, it’s not baking, but I need a place to toss this BBQ chicken recipe:

The rub:
(makes 2 cups)

1/2 cup paprika
1/4 cup kosher salt
1/4 cup sugar
2 tablespoons mustard powder
1/4 cup chile powder
1/4 cup ground cumin
2 tablespoons ground black pepper
1/4 cup granulated garlic
2 tablespoons cayenne (or less to taste)

The Sauce:
2 cups ketchup
1/4 cup cider vinegar
1/4 cup Worcestershire sauce
1/4 cup firmly packed brown sugar
2 tablespoons molasses
2 tablespoons prepared yellow mustard
1 tablespoon magic dust (recipe above)
1/2 teaspoon black pepper
Hot sauce (such as Tabasco) to taste
Prepare the barbecue sauce by putting all the ingredients into a small saucepan and bringing them to a boil. Turn down the heat so that it just bubbles a tiny bit and simmer it, whisking once in awhile, until it’s dark and thickened, 10-15 minutes.

The Chicken:
Rub the chicken and refridgerate for 2 – 24 hours.
Start the grill only on one side, leaving the other side off.
Put the chicken on the cool side of the grill for about 30 minutes till the chicken is 150 or so and golden brown.
The baste the chicken with the sauce and put closer to the hot side. Baste and turn till crispy on the outside. A little black is ok, but not too much.

8 braided challah

Today I made an 8 braided challah.

The braid method is as follows:

  1. make 8 strands
  2. layout strands in a semi-circle radiating from a center point.
  3. think of the left strand as number 1 and count up to number 8 on the right.
  4. Each time you move a strand, the strands are renumbered per their actual location.
  5. Start with moving 8 under 7 and then over 1.
  6. 8 over 5
  7. 2 under 3 over 8
  8. 1 over 4
  9. 7 under 6 over 1
  10. repeat steps 6 – 9 till done


Sourdough Starter – It’s alive!

Yup, it’s official, I’ve got it back 🙂  All this time later, I finally created a yoghurt/milk/flour version and it’s cooking along quite well 🙂

Yogurt Sourdough Starter

  • 1 cup milk–organic is best
  • 1 cup plain yogurt
  • 1 cup flour

Mix the milk and yogurt in something other than a metal container and put a lid on it but don’t let it completely seal since if things work right, the biproduct of this happy union will be gas–CO2–and you don’t want your container to explode or anything; that would be messy. Let that sit on your counter for 24 hours.

After 24 hours, dump in the flour and give it all a good stir. You’ll stir your starter everyday for the next 3-5 days. If it bubbles and smells a bit like bread and beer then you’ve succeeded! If there are no bubbles then it’s failed.

The Demise of my Sourdough

Yes folks, my sourdough starter died recently.  So sad!

Update 9/2018: My starter has died so many times over the years. Fear not, I just made more! Plus, I learned how to resuscitate it when it looked dead. Just use pineapple (or I’ve heard raison) juice instead of water when feeding the starter. It kicks it right back in gear.

Pie Shells

How To Make The Perfect Pie Crust

Check out Linda’s favorite recipes for the Perfect Pie Crust and favorite Pie Recipes (All your favorite pie recipes plus lots more).

There are three basic ingredients in a pie crust: fat, flour, and liquid.

You can come up with numerous variations just by changing your basic ingredients and their ratios. Check out favorite recipes for the Perfect Pie Crust.


Cold ingredients and limited handling are the key to preparing a wonderful pie crust.

The colder the better. All ingredients (even the flour) should be ice cold before mixing. It is especially important for the fat you are using (butter, lard, and/or vegetable shortening) to be very cold. Professionals say pie dough should never get warmer than 60 degrees F. If you are making the dough in a food processor you can even freeze the fat before using it.


Fats
: The type of fat you use will affect flavor and flakiness, while the amount affects tenderness. Flaky crusts result when bits of un-melted fat are layered between layers of flour and melt away with baking. They can be made from a variety of solid fats such as butter, vegetable shortening, and lard. Check out Pie Crust Recipes using various types of fat.

Butter, lard, and vegetable shortening must be chilled prior to use. If it is too warm, the flour will absorb too much of the fat and produce a tough crust. If using butter or margarine, cut into small pieces prior to adding to the flour.

Tip: Cut the butter into small (about 3/4 inch) cubes. Wrap in plastic wrap and freeze until frozen solid, at least 30 minutes. Butter Tip: Shred the frozen butter into the flour with a cheese grater.

Liquids: For a tender crust, you want just enough liquid to moisten the flour without drenching it. Liquids should be well chilled (actually liquids should be ice cold). The mixing, after water is added, is critical in making a pie dough – water should be added gradually to the dry ingredients and not all at once.

Mix by hand with your fingers or a pastry blender Use a minimum amount of liquid and handle the dough as little as possible. Overworking the dough will make it tough.  NOTE: If too much water is added, the dough will have to be mixed with more flour thus becoming overworked and tough. If too little water is added, it will cause a dry crumbly dough with poor handling qualities.

Tip: You can use the pinch test to see if your dough has the right amount of liquid. Pick up a small clump of dough and gently squeeze between your fingers. When the dough justs sticks together with small dry cracks, your dough is perfect.

Flour: To promote tenderness in your pie crust, choose a low protein wheat flour such as cake flour or pastry flour. All-purpose flour is readily available and works well for pie crusts. Unbleached flour is more tender. Always sift the flour before measuring it. In fact, all dry ingredients need to be sifted together.

Pastry-Type Flour: To make a pastry-type flour from all-purpose flour, place 1 tablespoon of cornstarch or other non-gluten flour in the bottom of the measuring cup for every cup of flour you measure.

If you want to use a whole grain flour to make pie crust, allow extra time. You will have a much more tender crust if you refrigerate the pie dough overnight before baking to allow the bran to rehydrate thoroughly.

Grandma Hagerman's Apple PiePerfect Pie Hints and Tips:

  1. If you roll out the dough on wax paper or parchment paper, it makes cleanup easier. To keep wax paper from slipping, sprinkle a few drops of water on the countertop before arranging the paper. When rolling dough out, always start from the center and work your way out in all directions. Use a heavy rolling pin for rolling piecrust.
  2. Pyrex glass pie plates are the best choice for baking your pies, as this type of pie pan conducts heat evenly, which allows the bottom crust of the pie to bake thoroughly. Also you can see when the bottom crust of your pie is browned. If using a glass pie plate, reduce the oven temperature by 25 degrees. Do not oil or grease pie plates. Thin, aluminum pie pans are a poor choice because they cook unevenly. If you have to use them, double them up and use two. Dull metal pie plates are better then shiny metal pans for making pies. The shiny metal pans keep the crust from browning properly.
  3. Hints to prevent bottom crust from getting soggy: Always chill pastry dough before rolling and cutting. Chill it again rolling and before baking, to further relax the gluten. Refrigerate the dough (in the pie plate) for 15 minutes before adding the filling.

    If pie has only a bottom crust, you can blind-bake (see #4 below) the crust and then moisture-proof it. You can brush it with a bit of egg white two or three minutes after it comes out of the oven.

    A good way to keep pie crust from becoming soggy is to sprinkle it with a mixture of equal parts sugar and flour before adding filling.

    Another way is to brush the unbaked bottom crust of a pie with a well-beaten egg white before filling. This keeps the berries and other fruits from making the pie bottoms mushy.

    Baking a frozen pie is also a help, as the crust begins to bake before the heat thaws the filling, and the entire pie bakes for longer than it would normally.

  4. Blind Bake the Pie Crust:

To prevent sliding by blind baking, first line the pie plate with aluminum foil. Take a piece of aluminum foil long enough so that when folded in half, it covers the pie plate. Fold it in half, then shape it on the counter by pressing your hand down in the middle and pulling up on the sides (making sort of a bowl shape.) Now put the foil in your pie shell and gently press it so that it evenly covers the bottom and sides of the pie dough. Now put your pie weights in (you can use beans, rice, rock salt – virtually any small, heat-proof items to weigh the crust down so that it neither puffs up nor slides down). Bake in the preheated oven for about 10 minutes. Take out the aluminum foil and pie weights, and continue baking until lightly browned.

Another trick to weigh down the dough is to place empty pie pans on top of the dough in the pie plate. This is called double panning.


Two-Crust Pie: Brush a little water around the edge of the bottom crust before placing the top crust. This helps create a good seal once the two are crimped together.

Tip from Sarah Macsek of Bethlehem, PA: Before placing double-crusted pies in the oven, loosely wrap aluminum foil around the pie crust edges. This will help the edges from browning too quickly. Remove the aluminum about 10 minutes before pies are ready to come out of the oven so the crust is properly browned.

Fruit Pies: Always make deep slits in the top crust of fruit pie. If you do not do this, the filling will be soft and soggy. To prevent the crust from getting too dark, you can cover it with a strip of aluminum foil or a pie shield. You also have the option of reducing the oven temperature if you notice things getting too dark.

Egg Wash: My mother, Dorothy Hagerman, taught me these tricks for achieving a nice golden brown top crust.

1 tablespoon heavy cream, half & half, or milk
1 large egg yolk

In a small bowl, beat cream and egg yolk together. Using a pastry brush, brush the surface of the top pie crust. Bake according to your recipe.

NOTE: My mother also uses just cream or milk on the top crust.

Cooling Baked Pies: Cool baked pies on a wire rack set on the counter. The rack allows air to circulate under the pie, preventing it from becoming soggy from the steam remaining it in.

Storing Prepared Pie Dough: Pie dough may be refrigerated for up to 2 days. Frozen, up to 3 months.

High-Altitude Baking: When making pies at high altitudes, pie crusts are not greatly affected. A slight increase in liquid may help keep them from becoming dry. Use as little flour as possible when rolling out the dough.
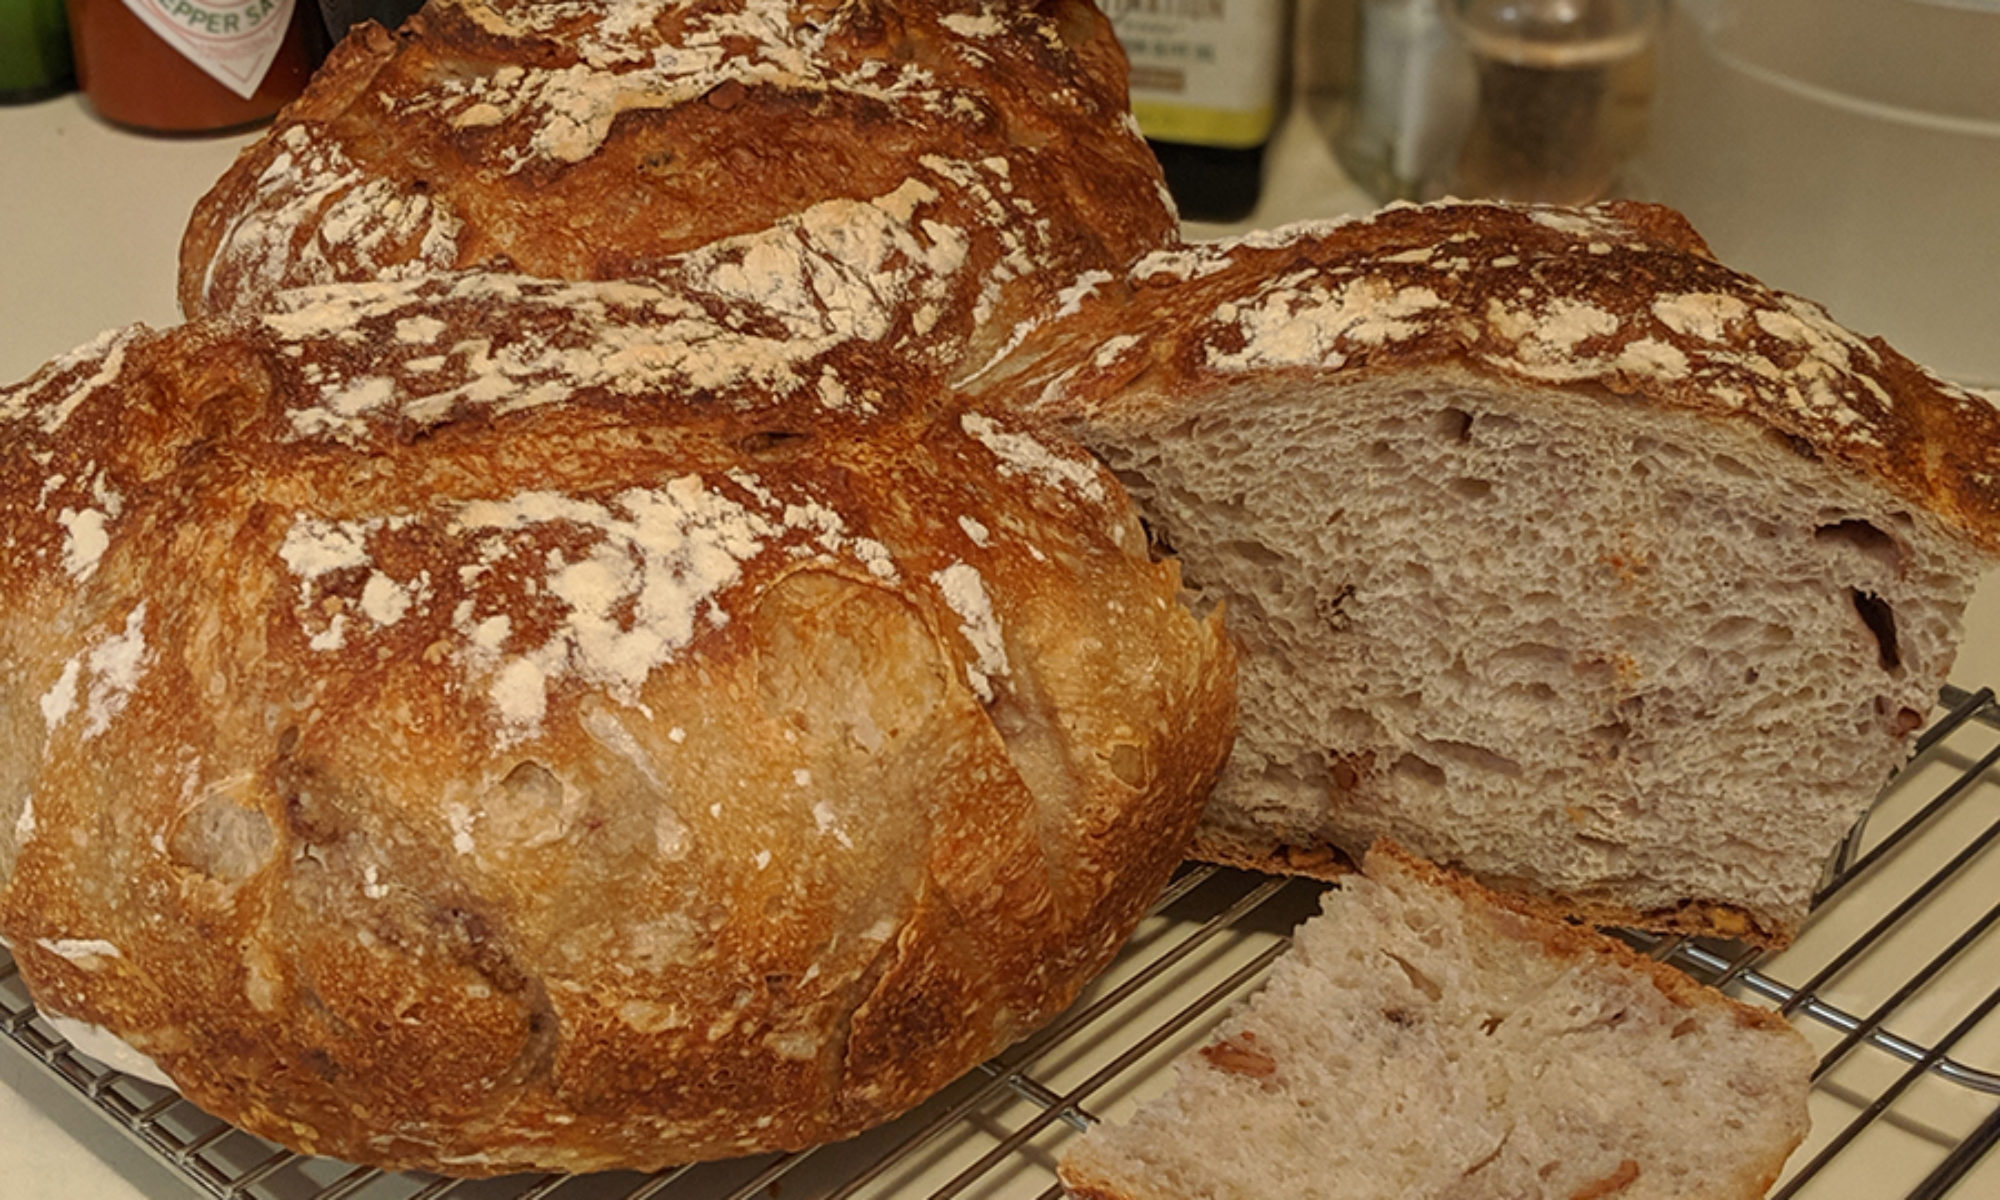

Challah

I’ve got challah down pat.  Woohoo!

In an earlier post today, I wrote about making a round of challah on some fire bricks.  While the top was not browned enough, this was possibly the best challah I’ve ever made.  Just the right moisture content and sweetness.  Once I get the oven situation resolved, it’ll also have the perfect color and crust.

Fire bricks demise

Ok, I’ve given the fire bricks their chance, and it’s a no go.

They are simply just too hot.

I made some adjustments to the brick configurations to hopefully help.  I reduced the number of bricks to allow for more space around them to allow for more steam to rise to the top, and I raised them up an inch to hopefully make them not as hot (aka further away from the heat source).  This didn’t really work. I made some challah yesterday and had to pull the loafs before the tops were really browned enough as the bottoms were about to burn.

Ah well, it was a $13 experiment.

…maybe I can use them in my grill 🙂

Fire brick update

Today I had the pleasure of baking on the new fire bricks.  WOW do they get hot.  I definitely need to fine tune the baking temperature and possibly time.

I cooked three baguettes today, using my standard temp and baking times.  Typically I start the oven at 550 or so, insert the bread, go through the steaming process, then drop the temp to 450 and bake for 12 – 15 minutes.

These loafs came out just on the slightly burnt side on the bottom and very done on the sides, but the tops could have used a few more minutes to get a nice browning.

Tomorrow’s plan is to start the oven at 450, not 550 and see if that makes the difference.  My theory is that the fire bricks pretty much stay at 550 throughout the baking process, which is why they burnt.

If that doesn’t work, then maybe I’ll raise the bricks up to the next rack level (1.5 inches).

😛

Fire bricks

Fire bricks…yup…went and figured out how to get them into my oven.

I’ve been baking with a pizza stone for the past year, which works, but is kinda small.  If I wanted to bake a baguette of any decent length, I had to angle the loaf diagonally across the stone.  It worked, but limited the amount of bread I could actually bake.

So I investigated my options.  First I turned to my favorite bread baking book, The Bread Baker’s Apprentice, by Peter Reinhart.  He discusses stones, but doesn’t really offer an actual solution.  After conducting my own research, I can see that this is not surprising at all.  There are tons of options out there, and your solution will really depend upon how much money you have and what is available to you in your region.

So, after perusing Peter’s book, I turned to Google and all the folks out there.  Various forums ended up offering me the most information.  What I walked away with was quarry stones or unglazed ceramic tiles.  These two things seemed the most prevalently used solutions.  I searched pretty hard here in Tempe, AZ for quarry stones or unglazed tiles to no avail.  Apparently, no-one carries unglazed tiles around here.  This is strange since tile is one of the most widely used flooring surfaces in the Phoenix valley. FYI, neither Lowes, nor Home Depot carry unglazed tile around here as well.

I called Arizona Tile ( a huge tile retailer and distributor ) and the *cough* most helpful sales lady instructed me that people come in and buy travertine slabs for their ovens.  I asked if it was a good stone to use in the oven and was promptly told, “that is what people buy”.  Ok, so Google hasn’t coughed up much on travertine use in ovens, so I ditch them (mostly because of the sales lady’s attitude).

So I ask myself, now what?  As a last ditch effort, I call the gravel materials store just down the street, Marvel.  The guy knows what I’m trying to do and recommends Fire Bricks.  They have them in stock and sell the all the time to folks who use them in their commercial pizza ovens.  So I go back to my friend, Google, and do a bit of research about Fire Bricks and they seem safe enough to cook on.  For about $13 all told, I figure, what the heck.  I run down and grab about 10 of them.

At this point, I can’t really fit them all in the oven.  They don’t ‘quite’ fit.  So…back to my friend Google, and 20 minutes later, I’m a pro at cutting brick with my tire iron and a ball-peen hammer 🙂

All that’s left is rubbing off the burrs on a crack in my concrete.  The bricks are made of up fireclay and they scrape very easily , so a handy crack in the polished concrete in my carport does the trick of removing all the burrs nicely.

I wash the bricks and stack them in the oven.  It’s a bit of a tight fit, so I hope the heat can get around the bricks well enough.

Next I turn the oven on to ‘warm’ so as to slowly dry out the bricks after washing them.  After about 20 minutes of that, I crank the oven up to about 500/550 (aka the broil setting) and let it heat up. I think it takes about an hour to actually get up to temperature, which is kinda long.

Well, yep, they get hot.  Two hours after turning off the oven, they are still radiating heat. Tomorrow I’ll be baking bread on them for the first time, so we’ll see!  I’ll keep you posted.